Chapter 3 - Setting up & Maintenance
Literally everything you need to know
with 2 chapters under your belt, it’s time to get to the final installment of this guide.
Now you’ll learn how to:
- Establish your initial tank setup
- Successfully conduct regular maintenance
- Effectively test and adjust water parameters as needed.
Setting Up Your First Tank
A step-by-step breakdown, explained like you're 5
Setting up your first tank
Run Equipment
Fully assemble and run your equipment
Wait 5 Days
Let it run for 5 days
Water Change
Test the water and change 50% percent of the water
Repeat
Repeat the process 4 more times until water is stable
Step 1: Assemble & Turn On Your Tank
- Set up your tank by assembling it.
- Place the substrate and decorations in the tank.
- Install the filter and heater, then fill the tank with water.
- Add water conditioner according to the label.
- If you’re using real plants- go ahead and plant them.
- Then, turn on the heater and filter.
- Sprinkle a little bit of fish food into the tank. That will kick the ammonia and encourage the filter to start working faster.
Step 2: Let It Run
- Let the tank run as usual for 5 days.
- After 5 days, remove 50% of the water and replace it with conditioned tank water.
- Let it run for another 5 days.
Step 3: Test Water & Repeat
- Test your tank water using a testing strip. Your levels will probably be very much out ideal parameters- which is expected.
- Do another 50% water change as before
- Wait another 5 days, and test the water again.
Success in this procedure hinges on patience. It’s recommended to go through a minimum of three cycles before achieving stable water parameters. Even if your water meets the criteria before the third cycle, refrain from adding any fish immediately. Rapid changes in parameters, known as a water crash, can occur and pose a threat to your fish.
The primary objective of this process is to establish beneficial bacteria in the tank. Without these bacteria, parameters may fluctuate, potentially shocking and endangering your fish.
It is advisable to complete this cycle for about three to five rounds, emphasizing regular testing. Once you obtain two consecutive “positive” tests, perform a final water change, and then you can safely introduce your fish.
Regular Maintenance
Here's how to care for your shrimp
Regular Maintenance Overview
Feed your shrimp commercial fish food twice a day. You can supplement that with another daily feeding of treats- usually in the form of live food like brine shrimp or vegetables like cucumbers or zucchini.
Once a week you’ll want to change about 25% of the water, vacuum the substrate, and scrape algae.
Once a month you’ll have to take your filter apart and rinse it in tank water to remove debris so it maintains it’s flow.
Feeding your Shrimp
You already know by now how and what to feed your pet shrimp, so instead of going in-depth, let’s just refresh your memory:
- Commercial fish food
- Live food (like brine shrimp)
Feed your shrimp with commercial food twice a day, and treats as needed. Remember not to overfeed- as those will force you to change the water more frequently.
Weekly Cleaning
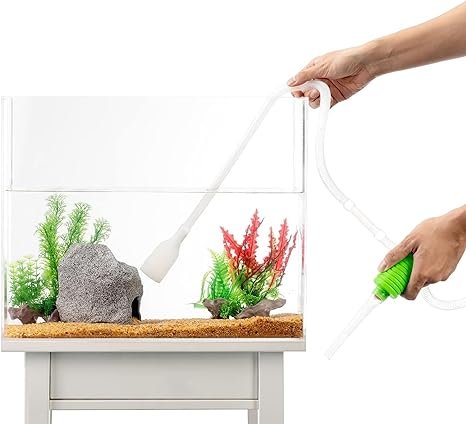
Siphon Substrate
Remove any fish poop and uneaten food that rests on the tank floor.
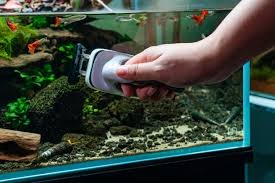
Scrape Algae
if needed, by using scrapper and then sucking out the particles with your siphon

Change Water
Change about 20-30 percent of the water once a week
A monthly task to include in your routine is cleaning your filter. While it’s a straightforward process like other maintenance tasks, there’s a crucial point to keep in mind:
Always rinse the filter using tank water, as tap water can harm the beneficial bacteria.
The main objective is to clear the debris obstructing the flow in the filter intake. Disassemble the filter, swish it around in a bucket of tank water, then reassemble and reinstall it.
Testing Your Water
Testing your water is probably the most common task when it comes to fishkeeping- especially as a beginner.
Sometimes, things will go wrong. While the definition of wrong varies, there’s one tell tale sign- your fish are not acting as normal. This might get you scratching your head thinking “How will I know” but the reality is that after watching your tank for a week you’ll be able to spot unusual behavior instinctively.
How to use a testing strip
Using a testing strip is a super easy 2-step process:
- Dip the strip
- Compare to the label
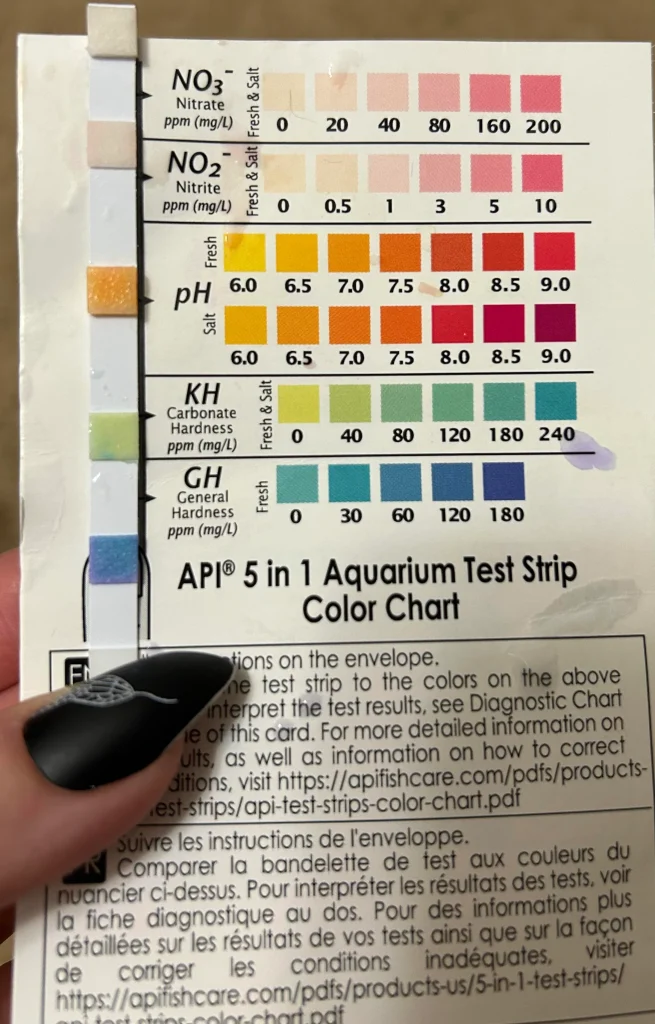
Water Parameters- What do they mean?
There are 5 water parameters, and they all sort of play with each others. they are:
Ammonia
Ideal Range: 0
Nitrite
Ideal Range: 0
Temperature
Ideal Range: 78-82°F (26-28°C)
pH
Ideal Range: 6.5-7.5
Nitrate
Ideal Range: below 20 ppm
Some testing kits (like the one above) will also include measurements for General Hardness (GH) and Carbonate Hardness (KH), but those are directly related to pH. Since goldfish aren’t as sensitive to those parameters as other species, I’ll save you confusion.
Water out of target? Here's how to fix it
Sometimes, and especially in the beginning, your water parameters will be out of the ideal range.
Let me give you a general overview of how frequently you’ll encounter each scenario:
| Parameter | Frequency | What To Do |
|---|---|---|
| Temperature | Rare | Check your thermometer |
| pH | Fairly Rare | Further troubleshooting needed |
| Ammonia | Common | Change the water |
| Nitrite | Common | Change the water |
| Nitrate | Common | Change the water |
Recap
We’ve covered quite a bit here, so let’s recap:
Feeding: twice a day, treats: once a day, or as you see fit.
Cleaning: once a week as a water change, once a month to maintain your filter.
Test your water every couple of days, or if you see your fish behaving abnormally.
