Coral Care Sheet
Learn everything you possibly need now.
Introduction
Setting up your first coral tank is pretty exciting.
If you’re like me, you’re probably sitting next to a bunch of equipment you just took out of the box, wondering where it all goes. And between thinking about whether you should fill the tank first and then install the heater or vice versa, you probably thought to yourself “What the heck am I doing?”
So here you are, staring at an empty tank.
“And while I’m at it”, you continue, “I wonder how often I should feed them. What’s fragging, dipping, and flow? And how do you know you’re even doing it right?”
Well, this article is your ultimate guide to take you from no idea to know-it-all. Let’s dive in.
Coral Care Sheet: What You Need To Know About Coral Keeping
Before we dive into the specific steps you’ll need to take as part of this coral care sheet, let’s first start with a high level overview of what keeps coral healthy in your home aquarium.
Water parameters are key
Corals draw minerals from the ocean water to build their biomass. This means that without those nutrients, your corals may become weak, break, or die.
Out of all the different water parameters out there, calcium, magnesium, and carbonate are the ones to watch for. This trio plays a big role in their metabolism and healthy growth.
What that means for you: monitor your water conditions as they play a huge part in your corals’ health.
for reference, those are the parameters you want to follow:
- Temperature: 74-78°F (23-26°C)
- Salinity: 1.023-1.025 specific gravity
- pH: 8.1-8.4
- Ammonia, Nitrite: 0 ppm
- Nitrate: <5-10 ppm
- Alkalinity: 7-11 dKH
- Calcium: 400-450 ppm
- Magnesium: 1,200-1,400 ppm
- Phosphate: <0.03 ppm
Corals need light, and it's not all the same
You want to make sure your corals get the right amount of light.
Each coral species has its own preferences, and it’s not only about the amount (in hours) of light they receive but also the light being in the right spectrum.
For the most part, soft corals are considered the most beginner-friendly because they don’t demand as much light as hard coral, while mushroom anemones are considered the least light-needy.
What that means for you: make sure they get the light they need- you can’t go without it.
They need to be fed
ok, so, here’s the thing- corals mainly eat algae. If you’ve had a fish tank for over 15 minutes you probably know all about algae- mainly from trying to get it out of your tank.
While the former is true, just remember this: for the algae to grow- it’ll need light. Since corals are known to be finicky, you’ll want to provide additional food in the form of nutrients.
Every species of coral will have its own food requirement- so make sure to ask when buying your coral about your coral’s specific needs.
What that means for you: remember to feed your coral as part of their care.
Water flow is important
In addition to lights, your coral depends on the current of your aquarium. The current helps distribute the food in the tank in a way that makes it possible for them to catch it.
In nature, the natural ocean tides also help keep sediment and detritus (which is a fancy word for ocean funk, like gravel, sand, and slit) off the corals- allowing them maximum surface area to absorb the sunshine.
What that means for you: make sure your tank has a constant current, as it is a vital part of caring for your coral.
Coral Care Guide: Common Activities
As part of caring for your coral, you can expect to “perform” various tasks. Here’s what you’ll spend most of your time:
Monitoring Water Parameters
As we’ve mentioned previously, water parameters are important for your coral’s well-being. You’ll need to test the water on a weekly or bi-weekly basis (more on that in Chapter 3)
Water Changes
You’ll need to change about 10-20% of the tank’s total water volume every week or so. As part of this process, you’ll also need to remove sediment and dirt from the bottom.
Algae Control
While we’re on the topic of water changes and maintenance, you’ll also need to control the amount of algae so it doesn’t overtake the tank. This includes scrapping the sides of the tank as part of your water changes.
Cleaning Pumps And Powerheads
Since the flow, or current, is super important to your coral well being- you’ll need to make sure there are no obstructions to your pump or powerhead. That entails removing them, disassembling them and cleaning them as needed.
Fragging
While corals are live animals, caring for them is a whole lot closer to plants. Sometimes corals will overgrow your tank- at which point they’ll need to be scaled back. You’ll do that by fragging- removing small pieces of coral to maintain it size.
P.S.
The fragged piece can be given away for others to grow or placed in a second tank.
In A Nutshell
Caring for coral is a weekly routine.
You can expect to:
- Test and change water
- Scrape and clean algae
- clean your filter/ powerhead
- Clean your substrate
- Frag your coral (as needed)
When it comes to feeding your corals- you’ll do that a few times a week- up to as frequently as once a day. How often you need to (and can) feed your corals will depend on how much nutrients and waste levels your tank water can accommodate before having negative effects.
How To Set Up Your First Coral Tank
The Equipment You'll Need
What Water Should You Use
Cycling An Empty Tank (New Tank Only)
Acclimating & Dipping Your Corals
The Equipment You Need
Before we jump right in and start assembling your setup, this coral care sheet won’t be complete unless we mention the equipment you’ll need to get started.
If you are just adding coral to your existing tank, feel free to skip this section.
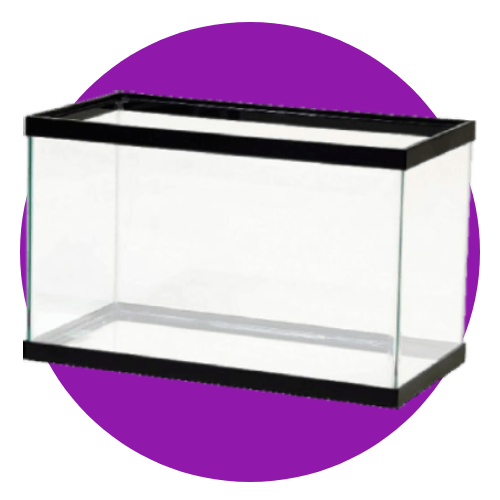
40-Gallon Tank Or larger
A 40-gallon tank is the minimum recommended size for coral because it provides more water volume for waste dilution, more surface area for beneficial bacteria growth, and more space for coral growth. Additionally, a larger tank is more stable and easier to maintain.
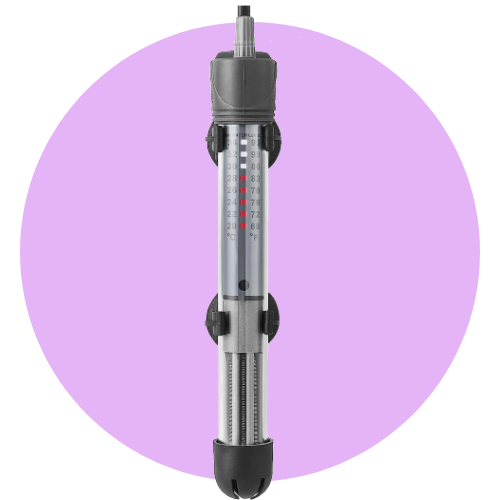
Heater
You'll need a heater to maintain a stable water temperatures. For coral tanks, a temperature of 75-82 degrees Fahrenheit is ideal.
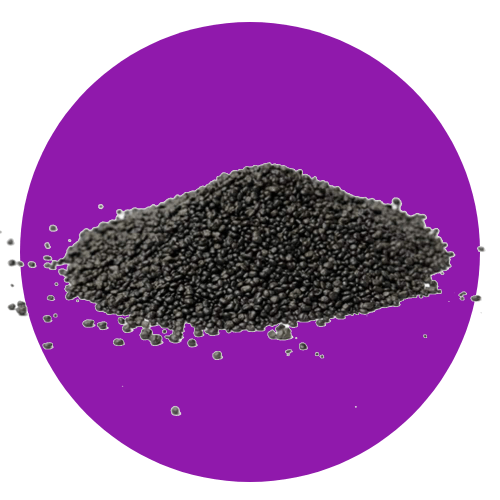
Substrate
Opt for aragonite sand, Fiji pink sand, or live sand. These are all made from calcium carbonate, which helps to maintain the pH and alkalinity of the water, which is important for coral health. Additionally, these substrates are all porous, which provides a place for beneficial bacteria to grow. Avoid crushed coral gravel, shells, and pebbles as these substrates are not as porous and can trap waste.
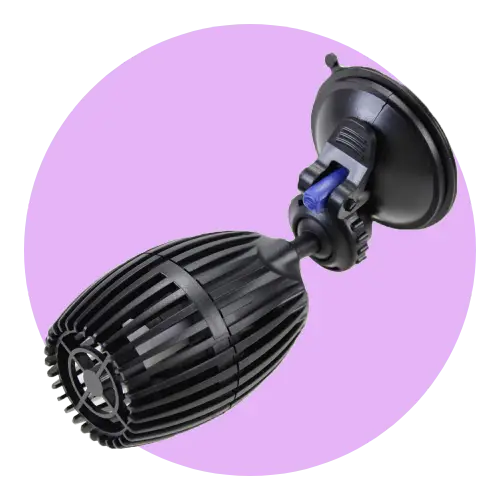
Circulator
This can be either a wavemaker or a powerhead. Either way, you want a device to simulate the natural currents found in the ocean. It will help spread out the food and "wash off" sediment of your coral.

Filter
Ideally, your filter will have multiple methods of filtration- chemical, biological and mechanical. Out of the 3- biological makes the biggest impact. Also, make sure the filter is appropriately sized for your tank.
Pro Tip
Remember to place your tank on a level, steady surface- away from drafts and away from direct sunlight. Another important thing to remember is to give yourself enough room around the tank for maintenance.
What Water Should You Use?
Unfortunately, you can’t just use pure tap water in your saltwater tank.
There are a lot of different options you can use- so let’s explore how to make the water suitable for your fish tank.
Reverse Osmosis De-Ionized water
RO/DI water is considered the most pure form of water. It is often the standard in laboratory experiments as tap water contains minerals, chlorine, and metals that can skew results and affect fish negatively.
Pros: best water money can buy. You’ll make RO/DI water by installing an RO/DI kit in your home- which will give you pure tank water on tap.
Cons: the kit starts at a couple hundred dollars upfront for purchase and installation, and requires changing of filters and elements which can add up.
Distilled water
Distilled water is water that has been boiled and then condensed back into its liquid form. This process removes most of the impurities from the water, making it a good alternative to RO/DI water.
However, distilled water is not as pure as RO/DI water, so it is important to test it regularly to make sure that the levels of impurities are within acceptable limits.
Pros: Widely available, relatively inexpensive.
Cons: Not as pure as RO/DI water, requires regular testing.
Water purification pitcher
If you only have a small tank, a water purification pitcher can be a convenient and affordable option. These pitchers use a filter to remove impurities from the water. With that said, it is important to change the filter regularly to ensure that it is still effective.
Pros: Affordable, easy to use.
Cons: Filters need to be changed regularly.
Bottled water
Bottled water is another option, but it is important to choose bottled water that is specifically labeled as “purified” or “deionized.” Some bottled waters simply have the chlorine and other contaminants removed, which is not enough for a coral tank.
Look for brands that specifically state that they use reverse osmosis or deionization to remove impurities.
Pros: Convenient, no need to test.
Cons: Can be expensive, not all brands are suitable for coral tanks.
Rainwater
A bit random- I know. Rainwater can be a good source of pure water for coral tanks, but it is important to collect it from a clean surface away from any potential sources of contamination. Rainwater can also be acidic, so it is important to test it before using it in your tank.
Pros: Free, pure.
Cons: Requires collection from a clean surface, can be acidic.
Setting Up Your First Tank
Process Overview
Rinse The Tank
Add Substrate
Install Gear
Add Water & Bacteria
Cycle
Setting Up your first tank is a 2 part process: the tank setup, and the coral preparation.
Setting up the tank for the first time takes a while because you have to wait for natural bacteria to build up in the tank. Without it, you’re risking a sudden water parameters crash that can kill your coral instantly.
The only thing you arm yourself with to make it cycle faster is patience. I’ve seen tanks taking 2 months to cycle, and that happens sometimes. The most important part that a lot of beginners miss is that until the water is stable, the tank isn’t ready.
Step 1- Location
Place your tank in a stable, level location that is away from direct sunlight and drafts. You’ll also need to make sure that you have enough space around the tank for maintenance.
Step 2- Rinse the Tank
Before you start setting up your tank, it’s important to rinse it out with RO/DI water or distilled water. This will remove any debris or contaminants that could harm your corals.
Step 3- Add the Substrate
Add a layer of substrate to the bottom of your tank. The type of substrate you choose will depend on the type of corals you want to keep. A good choice for a first-time coral tank is aragonite sand.
Here’s a rough idea of the amount of substrate you’ll need for each coral type:
| Substrate Depth | Coral Family/Group/Type |
|---|---|
| Shallow (1-2 inches) | Zoanthids, Palythoa, Ricordea, Mushrooms, LPS (Low Polyp Stony Corals) |
| Medium (2-3 inches) | SPS (Small Polyp Stony Corals), Acropora, Montipora, Porites |
| Deep (3-4 inches) | LPS (Low Polyp Stony Corals), Trachyphyllia, Blastomussa, Euphyllia |
| Very Deep (4 inches or more) | LPS (Low Polyp Stony Corals), Caulastrea, Goniastrea, Scolymia |
Step 3- Install equipment
Install your filter, powerhead, heater, and lights- just as if you’re ready to add your coral in.
Don’t turn your equipment on just yet- you’ll have to wait until the water submerges the elements at the very least.
Step 4- Fill the Tank with Water
To test the salinity of your water, you will need a hydrometer or refractometer. A hydrometer is a simple device that floats in the water and measures the salinity based on the density of the water. A refractometer is a more accurate device that measures the salinity by bending light.
If the salinity of your water is too low, you can add marine salt to raise it. If the salinity of your water is too high, you can do a partial water change with RO/DI water to lower it.
Here is a table that shows the different ways to measure salinity and their corresponding ranges:
| Measurement Method | Range |
|---|---|
| Hydrometer | 1.020-1.025 |
| Refractometer | 33-35 ppt (parts per thousand) |
| Specific gravity | 1.023-1.026 |
Step 5- Adding Bacteria
Now, with bacteria, there are multiple options you can go for. Options are ample, and they all do pretty much the same time. Whichever option you go with usually boils down to personal preference. Once you’ve selected your favorite source of beneficial bacteria, add it to the tank as directed by the label/ seller.
| Type of Beneficial Bacteria Solutions | Pros | Cons |
|---|---|---|
| Liquid Bacteria | Easy to use, can be added directly to the tank, effective in breaking down organic waste | May not be as long-lasting as other options, can cause cloudy water if not used properly |
| Dry Bacteria | Can be added directly to the tank or filter media, long-lasting, can be used to seed a new tank | May take longer to establish than liquid bacteria |
| Live Sand | Contains live beneficial bacteria, provides a natural filtration system, can help to reduce algae growth | Can be messy to work with, may introduce unwanted pests to the tank |
| Live Rock | Contains live beneficial bacteria, provides a natural habitat for corals, can help to reduce algae growth | Can be expensive, may introduce unwanted pests to the tank |
| Biopellets | Made from plastic beads that are colonized by beneficial bacteria, effective in removing nutrients from the water | Requires a specialized reactor, can be expensive |
| Biofilm | A layer of bacteria that forms on surfaces in the tank, can help to remove nutrients from the water, can be difficult to control | |
| Denitrifying Bacteria | Specialized bacteria that convert nitrates to nitrogen gas, can help to remove nitrogen from the water, can be difficult to maintain |
Step 6- Test & Change Waters
Now that everything is in the tank you’ll have to let it run for at least 5 days. You won’t need to add any more bacteria past your first round.
After 5 days, use a testing strip and test your water. You’ll most likely see high ammonia- because the bacteria hasn’t developed yet. That is expected. Change about 25% of the water and let run for another 5 days.
You’ll repeat the same charade for 3-4 more times. Once you see ammonia and nitrite at acceptable levels- let the tank run for another 5 days. That will prevent a sudden crash that will kill your coral if you place them too early.
Just to eliminate any confusion, here’s a timeline of what that would look like:
Day 1- Set up the tank, added bacteria, let it run.
Day 6- Test- first water change
Day 11- Test- second water Change
Day 16- Test (you may start to see some false stability here). Let’s assume the test came within range. Do a third water change.
Day 21: Test. Assuming the test is passed- you can start adding your coral. Change the water again. Pro tip: keep the water you replacing- you will need it to acclimate your coral.
Dipping and Acclimating Your Corals
Process Overview
Acclimate
30 Minutes
Dip
1.5 Hours
Place In Tank
Done!
Once your tank has been cycled, and the water is stable, you can move on to the next step of the process and prepare to add your corals into the tank. The adding process has 2 stages:
Dipping refers to dipping your coral in a medicated solution and then removing any pests. It is done to reduce the risk of introducing parasites into the tank.
Dripping, on the other hand, refers to acclimating your corals to the tank water by slowly dripping the water in a separate container with the corals.
Acclimate Your Coral
Receiving Your Coral
when you receive your coral they’ll come on a frag cap, which is a piece of material the coral will be attached to.
Some types of corals will be attached to the frag cap with a rubber band- which will make removal pretty simple. Other types will be glued to the cap to prevent them from getting damaged in transit. In the later case, you’ll need to use your fragging tools and gently remove the frag cap.
Acclimate Your Corals First
Shipping is pretty stressful on livestock, so the first thing you’ll do is acclimate your coral.
Start by placing it in a plastic container or a small tank. You want it to be submerged in water and avoid placing it under strong aquarium light. Remember, they just spent 24 hours in complete darkness- and sudden light can cause stress.
Now that you’ve placed your coral in a container, you can go about acclimating it in 2 ways:
Automatic Drip
An automatic drip device is usually the simplest way to go about it. Simply said, it drips tank water into your acclimation container and dilutes the shipping water.
Automatic drippers are hands-free which makes them a pretty popular option.
Manual Acclimation
The manual way to go about it is to add about 1/2 worth of tank water every 5 minutes. You’ll need to monitor your coral for any signs of stress (don’t worry- we’ve got a whole chapter about just that.)
Dipping to remove pests
Process Overview
Create a solution according to the label
Allow corals to rest for 15 minutes or as the label directs
Use the brush to remove any visible passangers
Rinse in tank water
Repeat the process twice for maximum effect.
Dipping- Required Tools
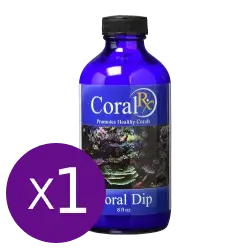
The medical solution to remove pests
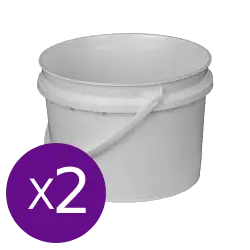
Plastic or any other material
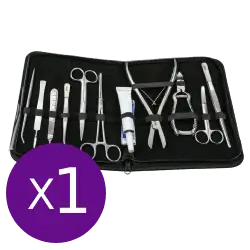
To remove the frag cap, if necessary
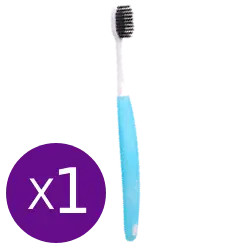
To scrub algae and pests
Set up your work station
The first step in dipping your corals is creating a solution. Mix your coral medication with tank water in your first container according to the label.
Fill your second container with tank water. How much water you actually need will depend on how big the corals you’re dipping. You’ll use the second container to rinse the dipped coral- so plan accordingly.
Remove the frag cap
If your coral is fixed into a frag cap- you’ll need to remove it. You’ll usually use your fragging tools and snip off the large chunks of the cap. Then use a scalpel or a butterknife to scrape off the obvious algae and stuff that shouldn’t be there.
Dip Your coral
Submerge your coral in dipping medication and allow them to sit there as long as the label requires.
Remove, brush and rinse
Once time is up, remove your coral from the dipping solution and scrub it with the brush. You’re looking to remove whatever isn’t supposed to be there. I know that this is rather vague- but once you look at it you’ll be able to tell what to target. Remember that it doesn’t have to be perfect- you’re just removing what you can.
Pro Tip: Don’t scrub too hard, as you risk removing to live layer in the process.
After scrubbing, rinse the coral in fresh tank water.
Repeat
Follow the steps from start to end one more time. Do not reuse the dip or rinsing solution, but make new ones.
Move To The Tank
Now that you’ve successfully dipped your coral (congrats, by the way, you did it like a real pro.) it’s time to move them to a more permanent home.
Installing a frag cap
The rubber band method
The Ongoing Care For Your Corals
Coral Care Requirements
Water Testing
Cleaning
Water Changes
Feeding
As part of caring for your corals, you’ll spend your time most of your time testing the water, cleaning, and feeding.
Expect to maintain the tank more frequently in the beginning- just to make sure everything is going according to plan.
Water Testing
The first thing about coral care is testing your water. I recommend you test your water weekly in the first 2 months after placing your coral.
After that, you can switch to testing the water bi-weekly.
Here’s what you’re looking for:
Temperature: Maintain a stable temperature range between 72°F and 80°F (22°C to 27°C) for optimal coral growth.
Salinity: Salinity, measured as specific gravity, should be maintained between 1.023 and 1.025. Use a refractometer or hydrometer to accurately measure salinity.
Ammonia (NH3): Ammonia is a toxic byproduct of fish waste and decomposition. Keep ammonia levels at 0 ppm to prevent harm to your corals.
Nitrite (NO2): Nitrite is another toxic byproduct that can stress or kill corals. Maintain nitrite levels at 0 ppm for a healthy coral reef.
Nitrate (NO3): Nitrate is a less toxic byproduct of the nitrogen cycle, but it can still affect coral health if levels get too high. Aim for nitrate levels below 20 ppm.
pH: pH measures the acidity or alkalinity of the water. Maintain a stable pH range between 8.1 and 8.4 for optimal coral growth.
Alkalinity (dKH): Alkalinity is a measure of the water’s buffering capacity and is crucial for maintaining stable pH levels. Aim for alkalinity levels between 8 and 12 dKH.
Calcium (Ca): Calcium is essential for coral skeleton growth and development. Maintain calcium levels between 400 and 450 ppm.
Magnesium (Mg): Magnesium is also important for coral skeleton formation and helps regulate calcium levels. Keep magnesium levels between 1200 and 1350 ppm.
Phosphate (PO4): Phosphate is a nutrient that algae feed on, and excessive levels can lead to algae growth and harm corals. Maintain phosphate levels below 0.1 ppm.
Required Tools
To make sure your water levels are within parameters, you’ll need a couple of tools. Some are more necessary than others, so let’s take a quick look at them.
Essential Testing Tools:
Liquid test kits: These are readily available and provide accurate results for most water parameters.
Refractometer or hydrometer: A refractometer is the most accurate tool for measuring salinity, while a hydrometer is a more affordable option.
pH meter: A pH meter provides more precise pH measurements than liquid test kits.
Nice-to-have Testing Tools:
Alkalinity checker: An alkalinity checker provides a quick and convenient way to check alkalinity levels.
Calcium checker: A calcium checker offers a fast and easy way to monitor calcium levels.
Magnesium checker: A magnesium checker allows for convenient magnesium level monitoring.
Phosphate checker: A phosphate checker provides a quick and easy way to check phosphate levels.
Cleaning
Cleaning Frequency
| What to clean | Why | How To Clean | How Often |
|---|---|---|---|
| Tank walls | Remove algae | Algae scrapper | Weekly |
| Substrate | Remove detritus and debris | Siphon pump/ Turkey Baster | Weekly |
| Filter Media | Remove detritus and debris | Rinse under saltwater* | 2-4 Weeks |
| Pump/ Powerhead | Equipment maintenance | According to manufacturer’s instructions | 1-3 Months |
*Avoid using freshwater to rinse your filter as the fresh water may kill your living beneficial bacteria.
Parts to Pay Most Attention To:
Areas of algae growth: Pay close attention to areas where algae tends to accumulate, such as on glass panels, live rock, and filter media.
Areas of detritus accumulation: Detritus can settle in sand or gravel substrate, on live rock, and around pumps and equipment, so focus on cleaning these areas regularly.
Signs of pests or diseases: Inspect your corals and live rock for signs of pests or diseases, and take appropriate action if necessary
Water Changes
Frequency of Water Changes
The frequency of water changes depends on the size and stocking level of your tank. For a moderately stocked reef tank, aim to perform a 10-20% water change every 1-2 weeks. This helps to remove dissolved waste products and replenish essential nutrients, maintaining a healthy and stable marine environment for your corals.
Preparation
Before performing a water change, gather the necessary equipment:
Mixing bucket or container
Pre-mixed saltwater or commercial marine salt mix
Hydrometer or refractometer to measure salinity
Thermometer to check water temperature
Syphon or water pump to remove and replace water
Hose or bucket to transport saltwater
Water Preparation
If using pre-mixed saltwater, ensure it is at the correct salinity level (1.023-1.025 SG or 33-35 ppt) and temperature (72-80°F or 22-27°C) before adding it to the tank.
If you’re using commercial marine salt mix, follow the manufacturer’s instructions to mix the salt with freshwater until you reach the desired salinity level. Check the temperature of the saltwater and adjust it if necessary to match the tank temperature.
Water Change Procedure
-
Remove Old Water: Use a siphon or water pump to carefully remove 10-20% of the old water from the tank. Avoid disturbing the sand bed or live rock unnecessarily.
-
Replace with New Water: Slowly pour the pre-mixed or prepared saltwater into the tank, ensuring it doesn’t splash or disturb the corals. Match the temperature of the new water to the tank water to avoid temperature shock.
-
Monitor Parameters: After the water change, check the salinity, pH, and alkalinity levels to ensure they are within acceptable ranges. Adjust as needed.
Additional Tips
Siphon or stir the sand bed gently during the water change to encourage the release of accumulated debris.
Avoid performing water changes during periods of high stress for your corals, such as during acclimation or after frag splitting.
Use a water change schedule that fits your routine and consistently maintain it for optimal tank health.
Remember, regular water changes are an essential part of reef tank maintenance, helping to keep your corals healthy and thriving in a stable and balanced marine environment.
Feeding
| Coral Type | Feeding frequency | Feeding method | Examples |
|---|---|---|---|
| Photosynthetic Corals | 1-2 times per week. | Broadcast feeding using a mix of phytoplankton, zooplankton, and coral food. | Zoanthids, ricordeas, montipora, acropora, pocillopora. |
| Non-Photosynthetic Corals | 3-4 times per week, or more frequently for some species. | Target feeding using a syringe or pipette. | Gorgonians, sea fans, LPS corals like Euphyllia and Trachyphyllia. |
The feeding requirements of corals vary depending on their species and growth form. Here’s a general guideline for feeding different types of corals:
General Feeding Tips
Avoid overfeeding: Overfeeding can lead to nutrient buildup and algae growth, which can harm corals.
Use high-quality coral food: Choose reputable brands of coral food that provide the nutrients your corals need.
Monitor coral health: Observe your corals regularly to ensure they are responding well to your feeding regimen.
Adjust feeding based on coral growth: If your corals are growing well, you may need to increase feeding frequency. If they are not growing, reduce feeding.
Remember, patience is key when feeding corals. It may take some time for your corals to adjust to a new feeding regimen, and their growth rates may vary depending on species and environmental conditions. By following these guidelines and observing your corals closely, you can provide them with the proper nutrition they need to thrive in your reef tank.
Coral Stress Signals
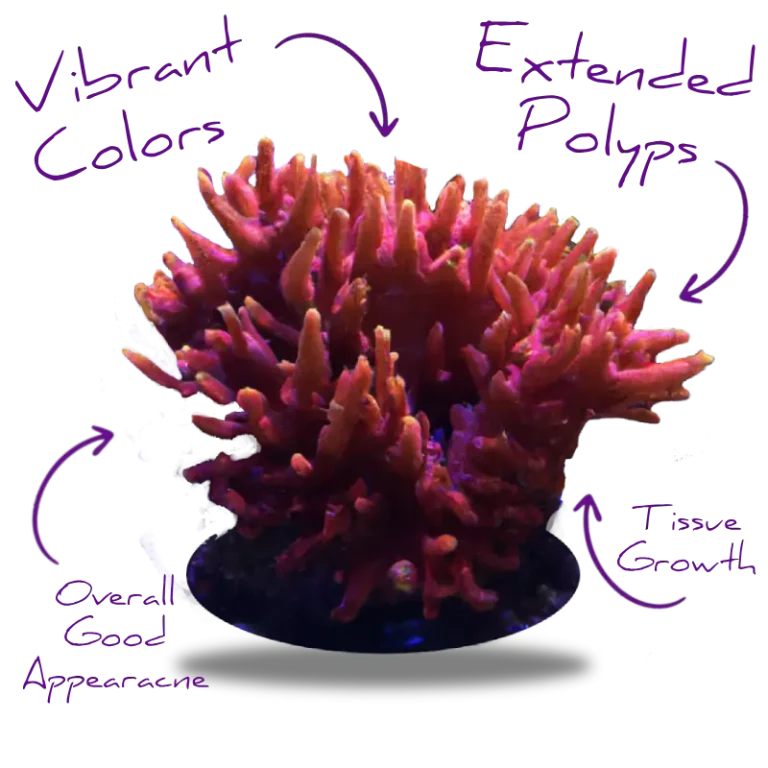
What Healthy Corals Look Like
8 Signs Your Coral Is Stressed
There are several signs that can indicate whether your corals are healthy and thriving or experiencing stress. Before we dive into the bad part, here are what healthy corals look like:
Signs Of a Stressed Coral
Signs of Stressed Corals:
Color fading: Coral bleaching, the loss of symbiotic algae, results in a pale or white appearance, indicating stress.
Polyp retraction: When corals are stressed, they may retract their polyps, reducing their feeding activity and nutrient intake.
Tissue recession: Stressed corals may show signs of tissue recession, shrinking in size and losing their overall structure.
Visible damage: Damage to coral tissue, such as lesions or abrasions, can indicate stress or disease.
Reduced growth: Stressed corals may exhibit slower growth rates or even decline in size.
Additional Signs of Coral Stress:
Excess mucus production: Corals may produce excessive mucus as a stress response, which can appear as a slimy coating on their tissue.
Changes in feeding behavior: Stressed corals may exhibit changes in feeding behavior, such as reduced feeding or increased aggression towards other corals.
Susceptibility to disease: Stressed corals are more susceptible to disease outbreaks, which can further damage their health.
By regularly observing your corals and monitoring their appearance, behavior, and growth, you can identify signs of stress early on and take corrective actions to maintain their health and vitality. Remember, consistent care and attention are crucial for maintaining a thriving reef tank ecosystem.
